Sneaker School - Recap

Over 60 hrs of work created a pair of bespoke Air Jordan 1's.  The process of making a pair of sneakers is straightforward: cut leather, sew leather, stretch leather, glue on sole. 

Even with a straightforward process, the shoe maker has the ability to put creativity and innovation into each pair he creates.

Its All A Process

Its All A Process

There were early mornings and late nights, but it was all worth it.  Stitching the leather was the toughest part for me.  A crooked stitch meant the thread had to be removed and that piece of leather might need to be replaced.  There was no room for error.

Dom "The Shoe Surgeon"

Dom "The Shoe Surgeon"

The Box

The Box

I'm extremely proud of what I created.  From the flyknit and leathers down to the lasting and stitching, I made it.  I have a Nike sole and a swoosh, but it was made by Aaron. 

One of One.

The 11 students came from different backgrounds, but all shared a love for sneakers and making.  Throughout the whole class, we learned and worked together.  Everyone helped each other realize thier creations.  I was grateful and inspired by the way we worked together as a team.

Dinner with the class

Dinner with the class

Sneaker School - Day 5

The 5th and last day is also the LAST day.  I started out with a fully stitched upper, sock and toe liner included.  The other students were at various stages of the construction process.  As one person finished learning, they were teaching someone else how to do it.  It was great,

The upper materials now need to stretch (lasted) over the silhouette of the Air Jordan 1.  The shoe last is made in the shape of the shoe, and is made from a plastic so nails can be used to pull the leather tight .  Before the leather is lasted, we nailed a board to the bottom of the last.  This is the strobel, the bottom of the shoe and the part that holds everything together.

With the strobel tacked onto the last, I started pulling and nailing the leather to the last.  First you pull down the heel, the the toe then alternate from side to side until the leather takes the shape of the last.

After lasting, the leather is bonded to the strobel, then the nails are removed.

The excess material on the bottom of the shoe is skived off to fit into the outsole. 

After seating the upper into the outsole cup, you mark the permeter of the shoe with a pen, this is the cement bond line to hold the shoe together.

The outsole and upper are bonded together, then the upper and sole are stitched together.

Tomorrow, I'll share pictures of the sneakers and what I learned from the course.

Sneaker School - Day 4

Day 4 was all about finishing sewing 30 pieces of leather, flyknit and fabric into two uppers.

With symmetrical patterns, the medial (inside) and lateral (outside) part of the shoe are the same.   The small cutouts on the top of the pattern (image to the right) are the stitching paths, to help line up each of the pieces.  The bottom row of cut outs are the guide for bottom edge of the shoe.

As each piece was stitched on, scraps turned into pieces, pieces turned into sections.  Once all of the outward facing pieces were sewn together, the shoe liner was added. 

One of my favorite aspect of Day 4 was being able to select the thread color.  I had a chance to do contrast stitching on the white leather and red swoosh, but still keep a black stitch on the pattern pieces.

To match the sole and the swoosh, I picked a red sock liner.  The sock liner is sewn on inside out to the outside of the shoe, foam is glued on, then its flipped and sewn onto the inside of the shoe. 


Day 4 was tough, lots of sewing and gluing. I didn't spend much time taking pictures, wanted to finish my shoe on time.

One of the final stitches was connecting the toe box to the upper.

The end of day 4 was a fully sewn upper and an outsole.  Time to connect the two...

IMG_5992.PNG

UP NEXT - DAY 5 - Lasting and Sole Bonding

Sneaker School - Day 3

After day 2, The Shoe Surgeon took our leathers to be skived.  Skiving is the removal of leather to reduce the thickness.  The overlapping pieces of leather were skived to fit together properly during bonding and stitching.

IMG_5898.JPG

In Learning About: Flat Knitting, I researched traditional sewing and found this video that explain the sewing process nicely.

Sewing is all about repetition.  I worked one stitch at a time on scrap pieces, until I felt comfortable to work on my pieces.  A sewing machine engages everything: arms, legs, eyes and ears.  The foot pedal, holding lining up the materials, listening to the hum of the machine.

After a few sloppy stitches, I started comparing my work to the one created by Nike on a high volume production line.  Perfect lines sewed by a person with years of experience?

Mass Production Sewing

Mass Production Sewing

Should I start that row over?  Should the stitches look exactly like the original? No.  Our learning comes from making "mistakes".

Each stitch told the story of learning by doing.  I am gaining confidence and building my custom creation, one stitch at a time.

UP NEXT - DAY 4 - More stitching/sewing and Lasting

Sneaker School - Day 2

I came in early on Day 2 because I wasn't very confident in the accuracy of my patterns.  After removing loose threads and adhesive from the edges and being more deliberate, the re-cut patterns were ready to roll.

Normally, the left and right shoe are made with different patterns.  For time and simplicity, we used one pattern to make the left and right shoe.  We had to take extra effort to ensure that certain pieces were symmetrical.

Next was material selection.  Ecco Leather had so many different colors and textures that it was tough to decide on the 2-3 to work with.

The pair I deconstructed had a white/red outsole, so I knew it was best for the swoosh to match the outsole. 1st color - Red.  The design of the AJ 1 incorporates a straight lines throughout (see below), so I wanted to pick a textured natural pattern to offset those lines but also connect with the outsole.  2nd color - black and white textured natural pattern.  I went with a natural white leather to balance the pattern.  3rd color - white leather.

Air-Jordan-1-341.jpg


Along with the base materials, I choose two accent pieces, a hexagonal stamp pressed leather, along with a swatch of my own deconstructed Airmax 2016 FlyKnit's.   The hex and flyknit pieces are my way of infusing technology and personal inspiration into my design.

Here are the four materials I selected for my AJ 1 (brought to you by Ecco Leather.)

Next step was tracing the pattern onto the leather pieces and cutting the material.

The end result from day 2.

UP NEXT - DAY 3 - Skiving and Sewing

Sneaker School - Day 1

The Decon/Recon course started today in Downtown LA.

Prior to the start of class, we selected a base shoe for customization. 

I chose to build my custom sneaker from the Air Jordan 1, designed by Peter Moore.  Besides the color of the outsole, the base colorway of the shoe doesn't matter, we will be replacing all the upper materials with a selection of leathers from Ecco Leather.

Air Jordan 1

Air Jordan 1

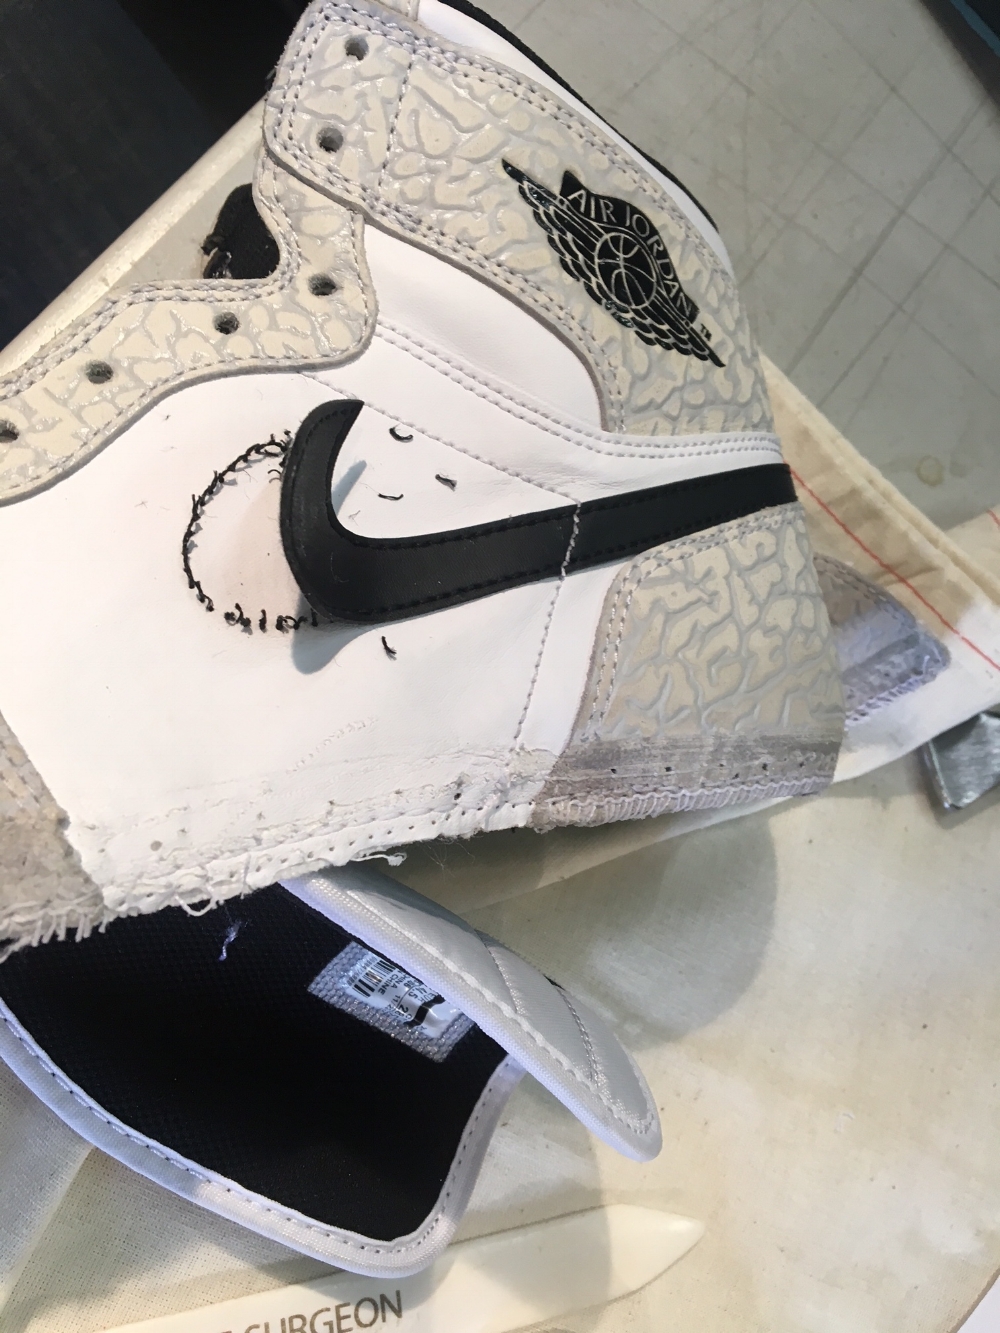
The first step in the deconstruction is removing the stitching and the outsole from the upper.

The bone folder, one of the tools we received with the class, is vital for separating the leather from the outsole without damaging either surface.

Removing the sole using a bone folder

Removing the sole using a bone folder

After the outsole is removed, I deconstructed the upper starting with the swoosh.

A thread puller and exacto knife were used to remove each component with surgical precision.

IMG_5831.JPG

There are over 1000 individual stitches in each shoe.  During the deconstruction process, I could see deeper into the footwear manufacturing process.  I started to understand how and why pieces are shaped in a certain way.  Why double and triple stitches exist at critical points in the shoe.  You can see the amount of labor that goes into making each pair of shoes.

Swooshless

Swooshless

The end result was 15 pieces needed for pattern tracing.

The final product of deconstruction

The final product of deconstruction

The final task for day 1 was pattern tracing.

Along with tracing the outside profile of each piece, we had to trace the stitch lines for all pieces that overlap other pieces.

UP NEXT - DAY 2 - material selection and pattern cutting

Sources

http://www.complex.com/sneakers/2015/05/why-the-chicago-jordan-1-matters

Kaizen Kung-Fu

Kaizen is the concept of making improvements to make people, processes, things incrementally better. 

The 36th Chamber of Shaolin is one of my favorite movies.  I discovered it through listening to Wu-Tang Clan.  One of my favorite examples of Kaizen is in this movie. 


A majority of the film takes place in a Shaolin monastery, where the main character San-Te, is learning Kung-Fu.  Through each of the 35 training chambers, he is met with unique physical and mental challenges.  Through repeated failure along with incremental improvements, San Te is able to defeat all 35 chambers faster than anyone before.


The justice officer for the monastery, seeing San Te unfit, challenges him to a duel.  In the first match, San Te is defeated.  Using the Kaizen process, he chooses a different weapon.  In the 2nd match, his fighting skills improved, but he still loses.  After the 2nd loss, instead of using an existing weapon, San Te created one.


To defeat the sword, he needed a weapon that could create distance and light for attacking, but also strong for blocking.  He made a three sectioned staff.

The new and different defeated the traditional through continuous improvement.

Learning About : Flat Knitting

I wanted to dig deeper and research how PrimeKnit and Flyknit are created.

In this video, PrimeKnit uppers are created on a Stoll Flat Knitting Machine (CMS530 HP).

By changing the type of fabric, the stitch formation and tuck formation, the upper receivesdifferent zones of compression and comfort.

The ankle sleeve on the Lunar Epic Flynknit has regions of looser knit in the ankle bone area, and a tighter knit elsewhere to provide compression.

Decon & Recon - The Shoe Surgeon

“The capacity to learn is a gift; The ability to learn is a skill; The willingness to learn is a choice.”
— Brian Herbert

Next week, I'll be in taking the Decon/Recon course offered by The Shoe Surgeon.  Over 5 days, with a handful of other students, we will take an existing shoe, deconstruct it, cut/sew new patterns and end up with a one of one shoe. 

Custom AJ 1 - The Shoe Surgeon

Custom AJ 1 - The Shoe Surgeon

I'm excited to work with The Shoe Surgeon (Dominic Chambrone).  His story is inspiring and we share a similar vision for improving and creating newness.

I want to evolve and do stuff that no one else has done yet in the industry and be ahead of the game
— Dominic “The Shoe Surgeon” Chambrone

The course will also bring together students who share a passion for shoes and learning.  Until now, there were few places where people can gain footwear experience outside of a shoe repair store or working for a large footwear company.  Learning by doing is the best way to gain footwear experience.

Besides gaining experience, the course give you the skills necessary to start your own footwear business.

I'm looking forward to creating a story through my pair.  Selecting the colors and materials, cutting and sewing using my hands.  The end product is a true reflection of my creativity, hard work and attention to detail.


The air out there

M Frank Rudy, an aerospace engineer, patented the Nike Air cushioning system in 1979. 

This was 8 years before David Forland and Tinker Hatfield made Nike Air infamous by making the air visible in the Air Max 1 in 1987.

After seeing the blow mold process used for NASA space helmets, Frank used these insights to create the air bag for footwear applications.

Frank Rudy found that the work he was doing for NASA could also be of practical use on the ground. He was able to encapsulate dense gases into rubber membranes creating a gas or “AIR” bag. The rubber molding processes he and his NASA colleagues were working with allowed for the creation of a hollowed out midsole to fit the air bag. The technology would exponentially decrease the impact a single step has on the body.
— http://sneakerhistory.com
“He wasn’t one to shy away from the ultimate challenge. The bigger the problem the more complex the problem, the deeper he dug in.”

Frank took his ideas to footwear companies back in the 70's, no one was interested.   There was a culture of risk aversion to changing existing manufacturing processes.

Until Nike took a risk on an aerospace engineer with a crazy idea on changing the existing manufacturing process.

“Frank Rudy holds a singular place in the pantheon of Nike innovation. His relentless creativity and focus on solving problems was, in many ways, the template for how Nike pursues performance to this very day.”
— Mark Parker

An aerospace engineer with relentless creativity and a focus on solving problems.

Frank passed away in 2009, but the effects of his innovations are still changing the footwear manufacturing process today with shoes like the Nike Vapormax

Thank You Frank